April 21, 2025
How to Install Your Panthaire APEX Cooling System: A Step-by-Step Guide
Installing your Panthaire APEX system is straightforward when you follow the right steps. Below, we walk you through unboxing, preparing the space, mounting and connecting the unit, and setting up the ducts for optimal performance. Let’s get started!
Duct size requirements for each APEX model:
APEX 3500/4000
- Supply Duct: 8"
- Return Duct: 8"
- Max Length Per Duct Run (machine → cellar): 25 ft
APEX 5000 (Launching in June 2025)
- Supply Duct: 8"
- Return Duct: 8"
- Max Length Per Duct Run (machine → cellar): 25 ft
APEX 7000 (Launching in June 2025)
- Supply Duct: 8"
- Return Duct: 10"
- Max Length Per Duct Run (machine → cellar): 25 ft /bul
Make sure to have the correct duct diameters on hand for your specific APEX model.
1. Unboxing Your APEX Delivery
What’s in the Box?
- Cooling Module
- Drainage Tube
- User Manual
- Digital Wall Control
Before you begin the installation, carefully unpack all components and confirm you have everything listed above. Inspect each item for any visible damage. If anything seems amiss, contact Panthaire’s customer support right away.
Pro Tip: Keep the original packaging until the system is fully installed and tested. It can be useful for safe storage or transport if needed.


2. Building the Right Environment
Location & Room Selection
- Choose a calm, interior space such as a basement or enclosed room with minimal exposure to external heat or humidity.
- Ensure the area around your cellier (wine cellar) or display is away from direct sunlight or extreme temperature changes.

Insulation & Vapor Barrier
- Insulate walls and ceilings around the wine cellar using materials rated R-20 or higher. Proper insulation maintains consistent temperatures and reduces energy consumption.
- Install a vapor barrier (typically 6 mil polyethylene) on the warm side of the walls to prevent moisture buildup behind insulation. Overlap and seal all seams for a tight, moisture-resistant seal.

Flooring & Materials
- Choose thermally stable finishes for the flooring (sealed concrete, natural stone, or oversized tile). These surfaces handle temperature fluctuations more effectively than untreated wood or carpet.
- In high-humidity regions, be extra mindful of potential condensation points. Use construction adhesives and sealants designed to resist moisture.

3. Installing the APEX Unit
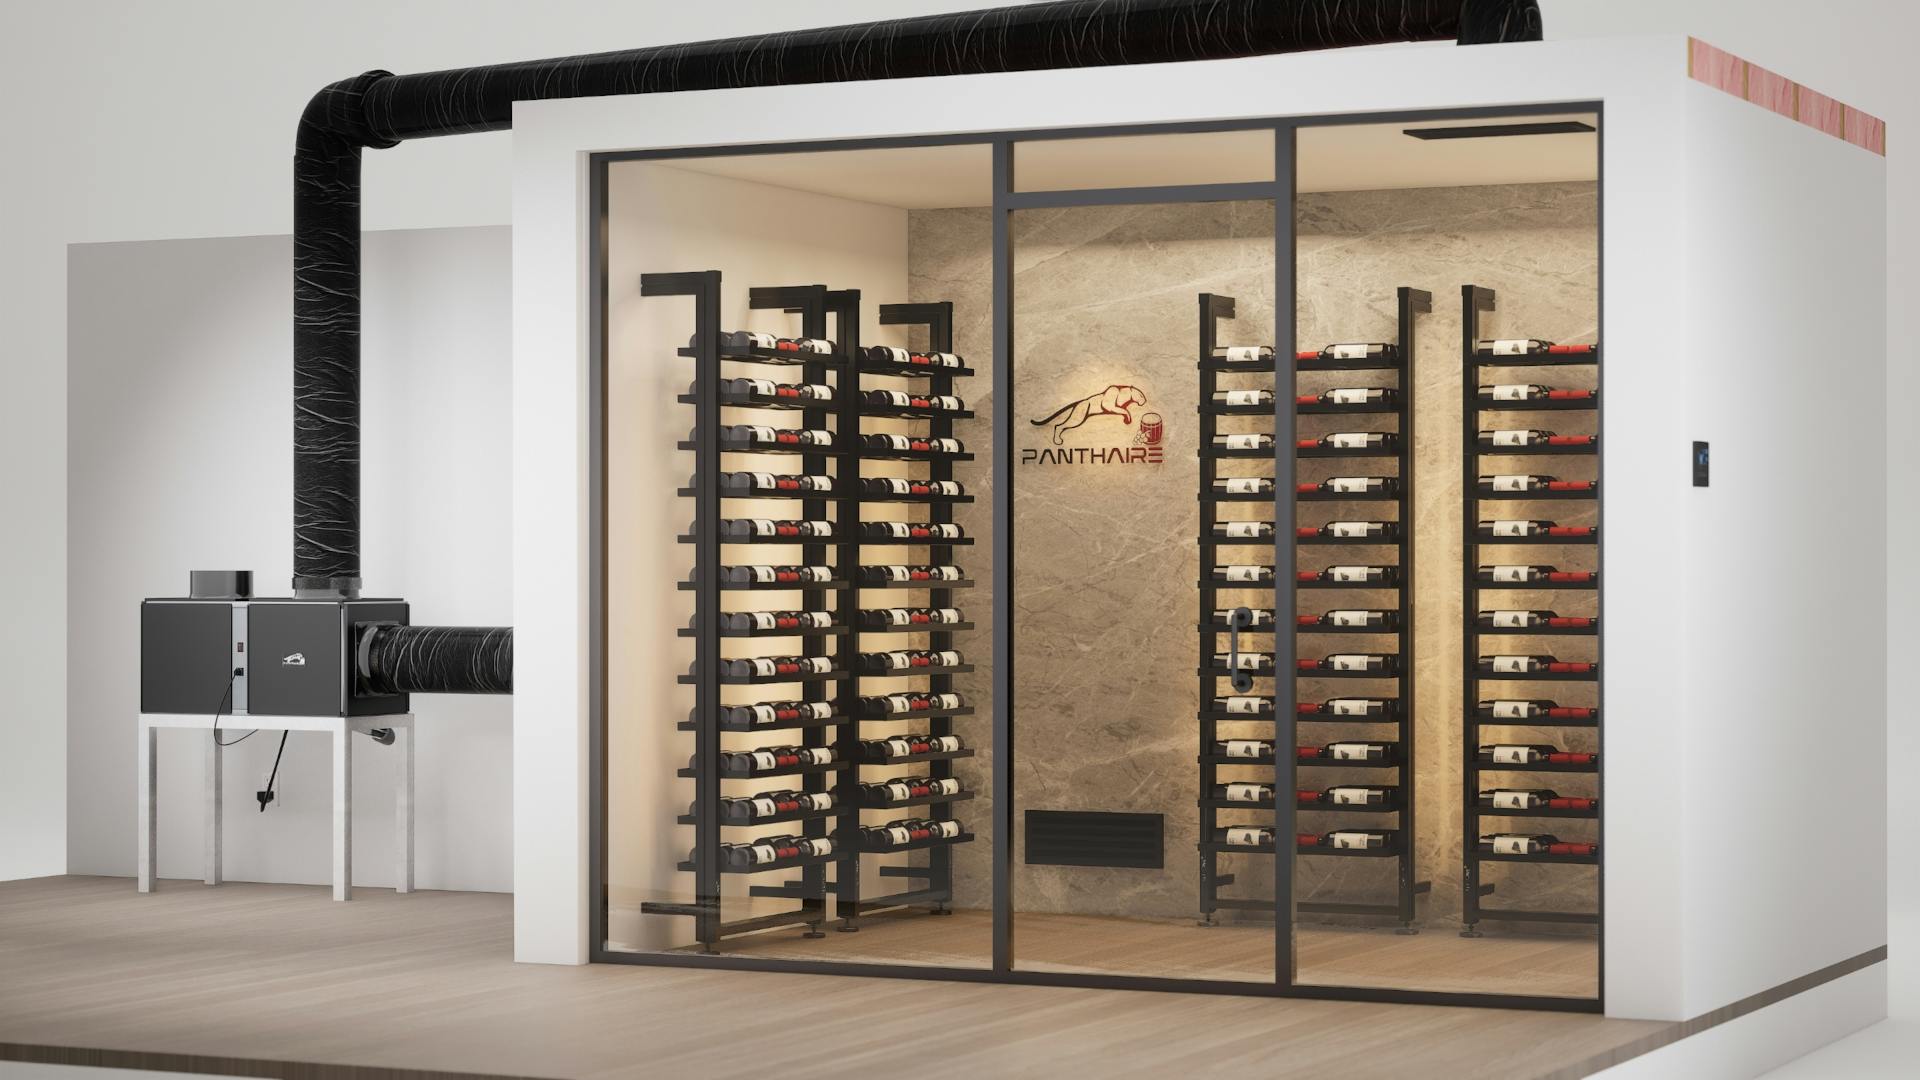
Positioning the Cooling Module
- Select a well-ventilated mechanical space or utility area adjacent to your wine room. Ideally, this location allows quick access for servicing and keeps the bulky hardware out of sight.
- Place the unit on a flat, stable surface, ensuring adequate clearance around intake and exhaust ports.

Connecting the Insulated Ducts
- Attach the intake and exhaust ducts to the APEX module’s labeled ports. Secure them with hose clamps or suitable fasteners to prevent air leaks.
- Route the ducts through the wall or ceiling to reach your wine cellar. Avoid sharp bends or excessive lengths—keep them below the recommended maximum (typically around 25 ft) for optimal airflow.

Drainage & Electrical Requirements
- Attach the drainage tube to the unit’s condensate drain. Run this tube toward a nearby floor drain or external outlet—make sure it has a downward slope so water flows freely.
- Use a dedicated 120 V / 15 A circuit to power the APEX module. This prevents overload and ensures maximum performance. If required by local code, enlist a qualified electrician for safe wiring.
Optional: If the mechanical area tends to run warm, consider installing an additional duct that redirects warm exhaust air to a well-ventilated space.

4. Finishing Vents & Airflow
Duct Layout
- Position the insulated ducts so the inlet and outlet are spaced far enough apart—generally on opposite sides of the cellar—to create balanced air circulation.
- Maintain a maximum duct distance of about 25 ft to preserve airflow efficiency.

Vent Placement
- Mount the grilles (or diffusers) at a suitable height—often one near the ceiling and one near the floor—to optimize temperature distribution.
- Use sound-dampening materials if you want to further reduce operational noise.
Racking & Lighting
- Once the ducts are in place, add your wine racking and any lighting accents. Subtle LED strips or recessed spotlights can highlight your collection without generating excessive heat.
- Seal any gaps around vent openings or duct penetrations with weatherstripping or sealant to prevent unwanted air leaks.

5. Testing & Final Touches
- Power On the unit and set your desired temperature on the digital wall control.
- Wait a few hours for the cellar to reach the setpoint.
- Verify airflow at the inlet and outlet vents, checking that cool air enters the wine space evenly and exhaust air is properly vented.
- Monitor the condensate drain for any leaks or blockages.
- Adjust the temperature settings as needed to fine-tune the environment.
Tip: Use a digital hygrometer/thermometer inside the cellar to confirm stable temperature and humidity levels over the first few days of operation.

Maintenance Reminders
- Filter Cleaning: Inspect and clean the APEX unit’s air filters regularly to maintain efficiency. A clogged filter can reduce cooling capacity and increase energy usage.
- Drain Line Check: Ensure the condensate drain remains clear to prevent water backups.
- Annual Inspection: Schedule a yearly checkup with a professional installer or an HVAC technician to verify duct seals, refrigerant levels, and overall performance.

Experience Seamless APEX Integration
By following these essential steps, your Panthaire APEX cooling system will blend effortlessly into your wine cellar—offering near-silent performance and stable conditions for your cherished bottles. For more details, including videos or advanced tips, explore our official Installation Guide at:
Panthaire.com/installation
Questions or need assistance?
Contact our support team:
- Email: [email protected]
Conclusion
A well-executed APEX installation marries form and function—keeping cooling equipment discreet while upholding the elegance of your modern wine display. By preparing your space with proper insulation, vapor barriers, and a thoughtful duct layout, you’ll enjoy minimal noise, stable temperatures, and the satisfaction of a truly professional finish. Here’s to preserving your finest vintages in style!